Monday, June 30, 2008

Old Pickup Card and Coloring Guide

Loads of Love - Stampin' Up card
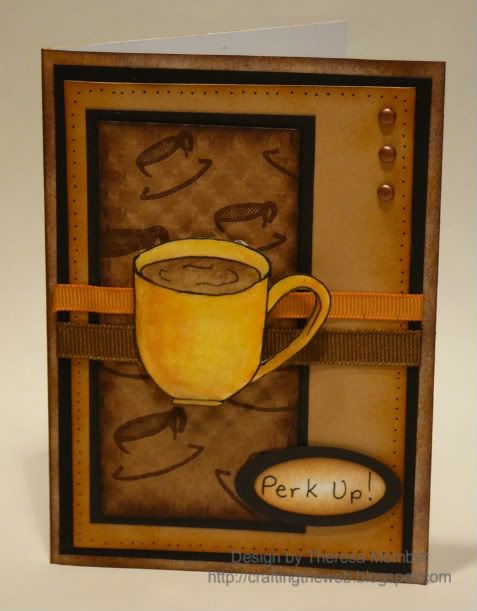
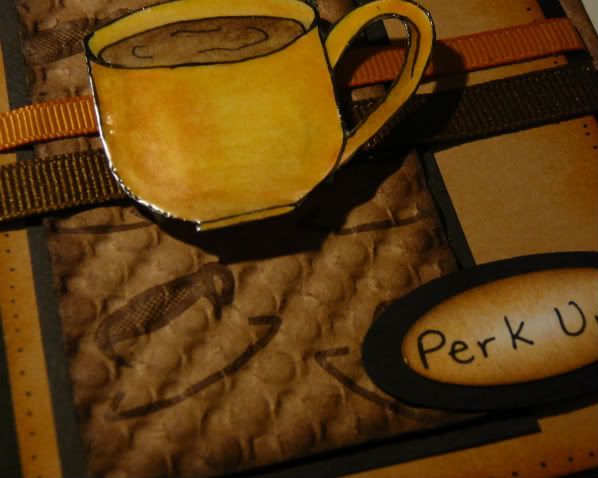
Good morning. I made this card over the weekend and wanted to share it with you. I also snapped pictures as I did the coloring to show you how I colored the pickup.

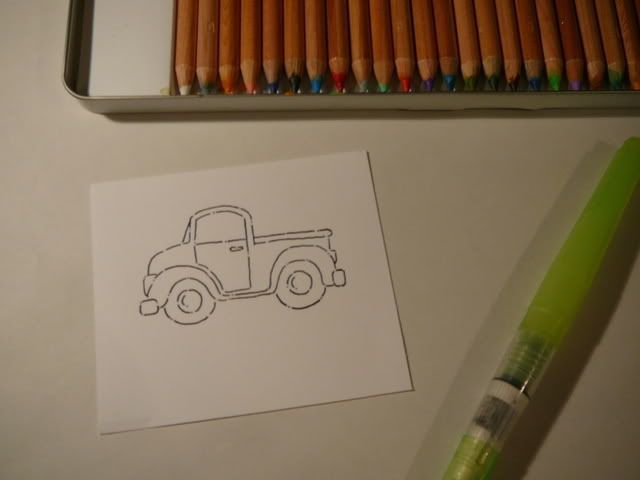
Most of the cards you see on my blog have been colored with water color pencils and an aqua pen.

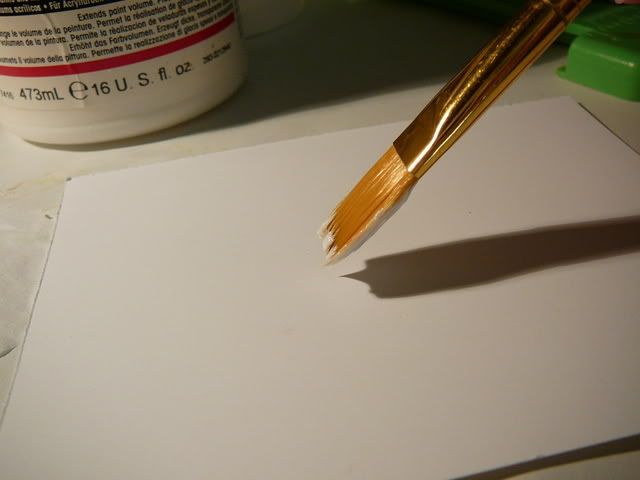
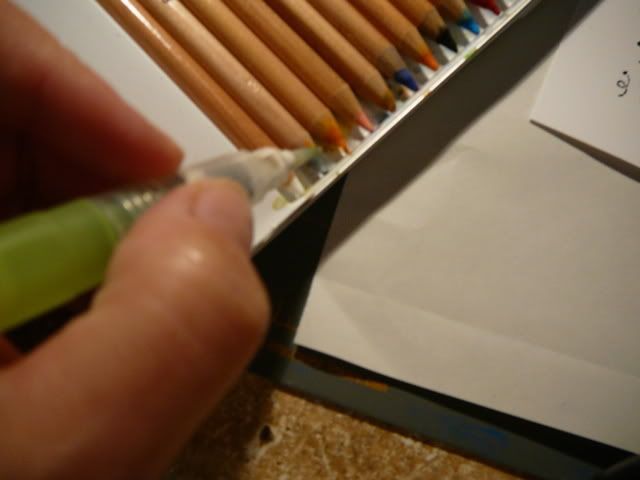
I usually just leave my pencils in the box and grab color with the pen. If your aqua pen is too dry it is hard to get the color from the pencil. Just give it a little squeeze to get more water out. Keep a paper towel handy for wiping excess water off.

If your pen is too wet it may be hard to control and to "stay in the lines." It is a good idea to have a piece of scrap paper that you can test on before actually applying the color to your image.

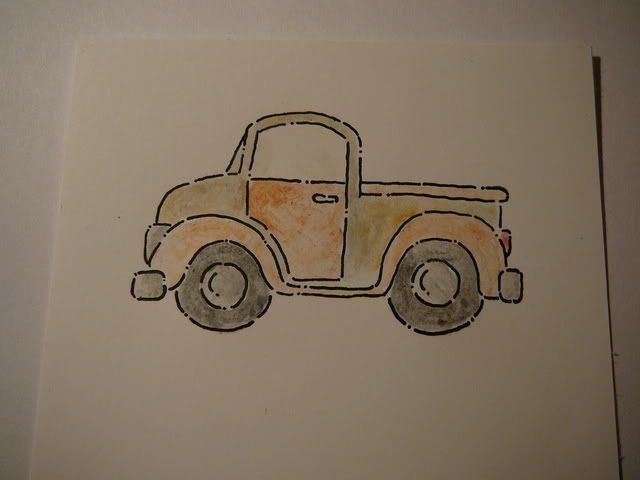
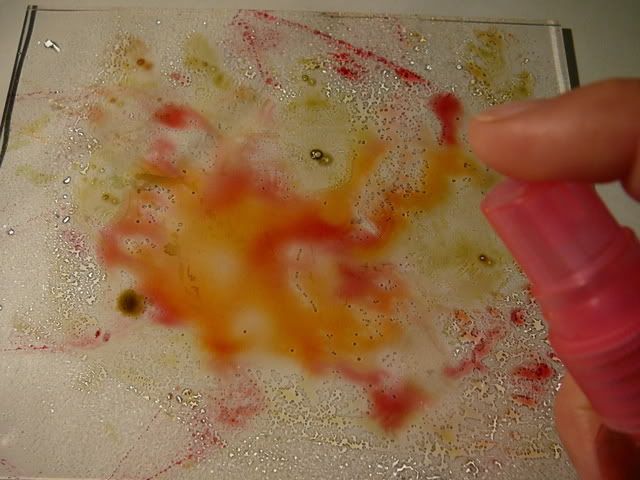
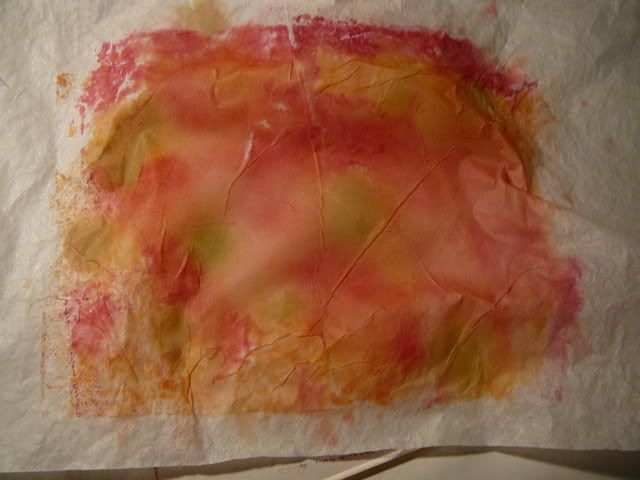
I always start by laying down just a little bit of color and work up very slowly. More water in your pen tip with create a washed out color, less will create a more saturated color.

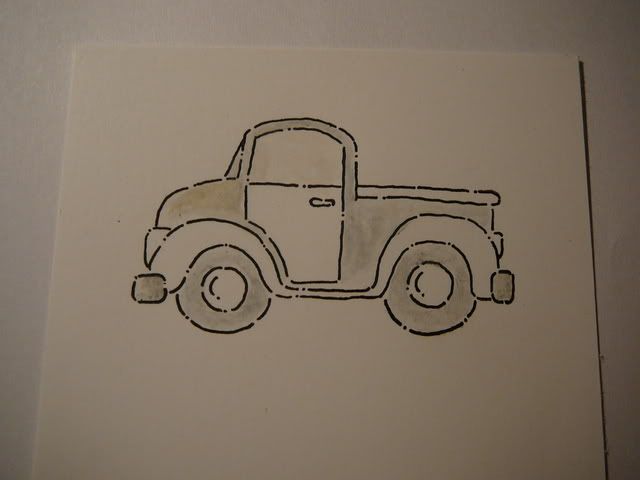
In this case I want a mottled look so my pickup will appear aged, so I didn't pre-wet my paper or blend my colors as much at I might if coloring a flower.

If you do want a very smooth transition, build your colors up very slowly, starting with the lightest color and going darker. Also, using your aqua pen without any color on it to pre-soak your paper will help prevent lines of color and make blending easier.

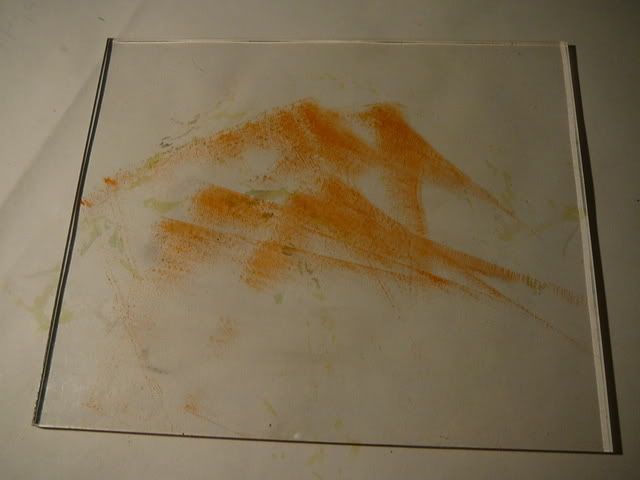
More building up of color.
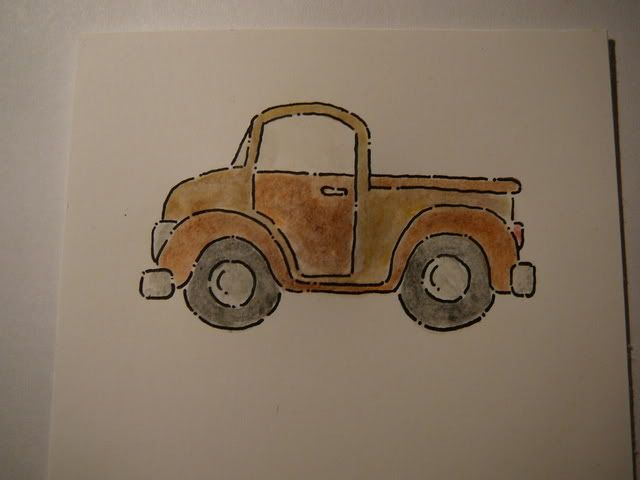
Still, more.

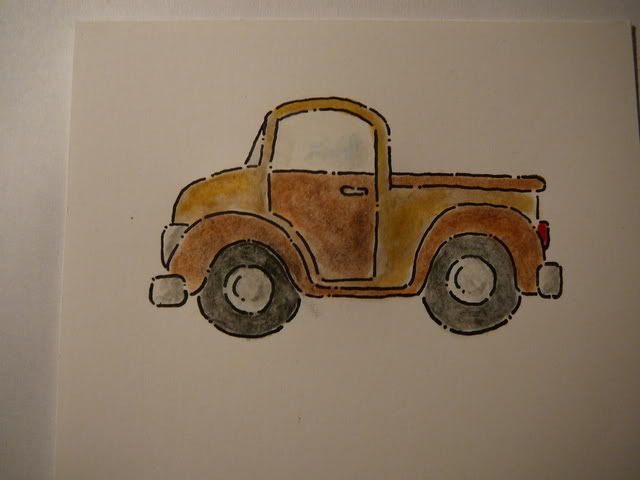
Now I am pretty happy with the colors. At this point you could mask off the pickup and add a background or just use it as is.

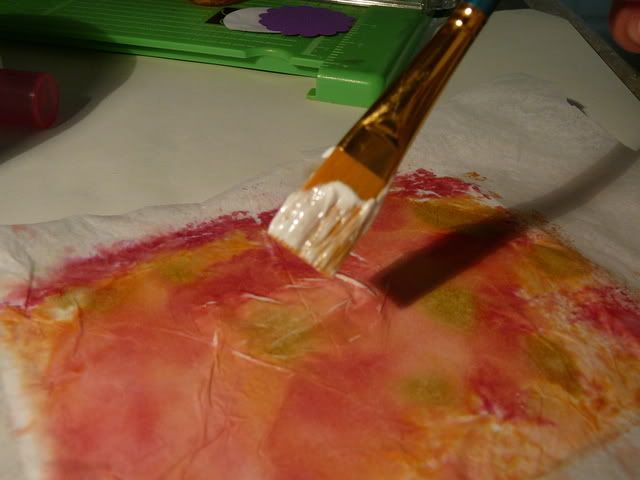
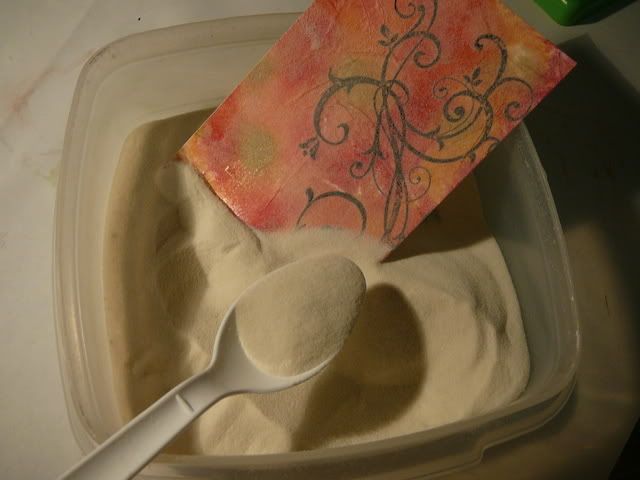
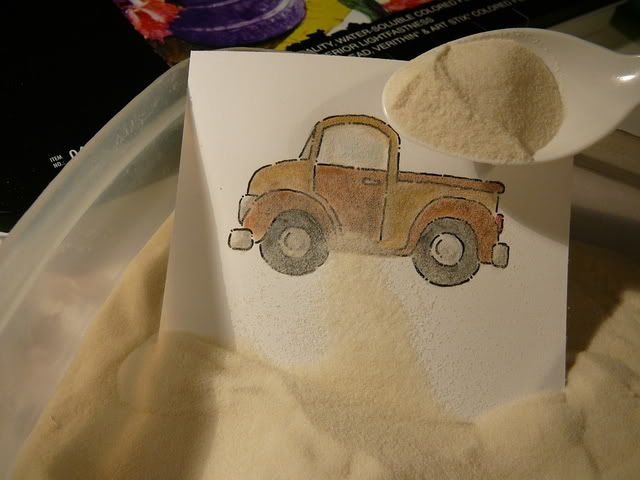
I really like embossing my focal point images, so I used a Versa Mark pen and went over the entire image and then dipped in clear embossing powder. Be certain your paper is completely dry before your do this, or your embossing may be spotty.

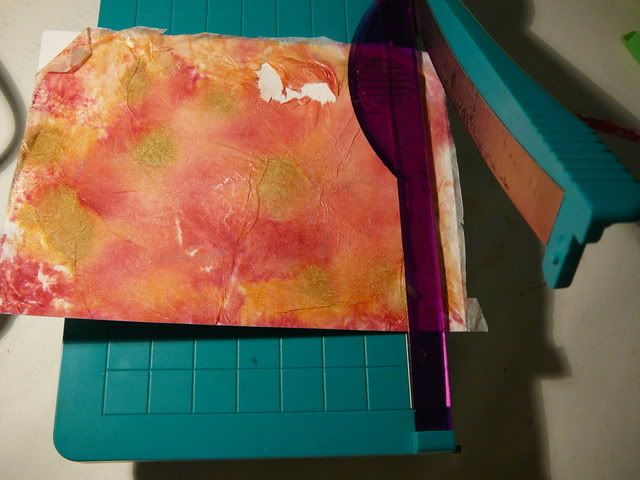
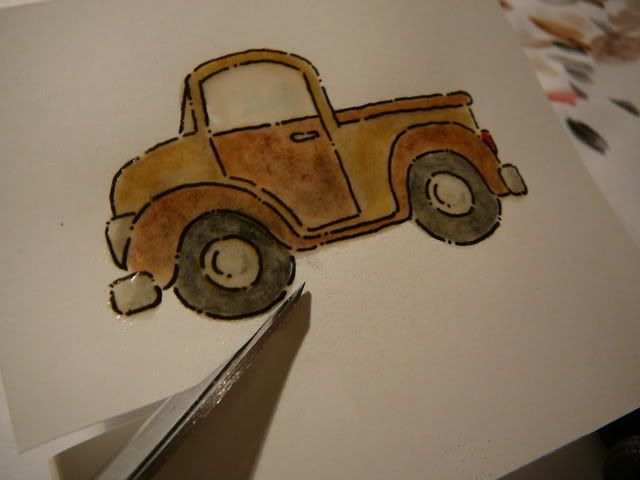
Next I cut my image out. I really like how the clear embossing makes the colors richer.

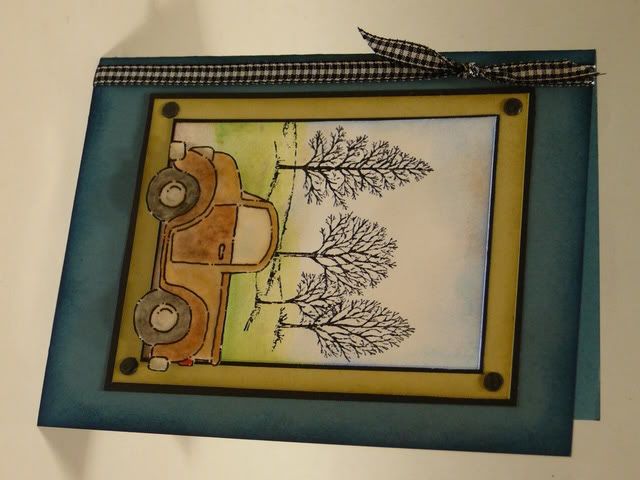
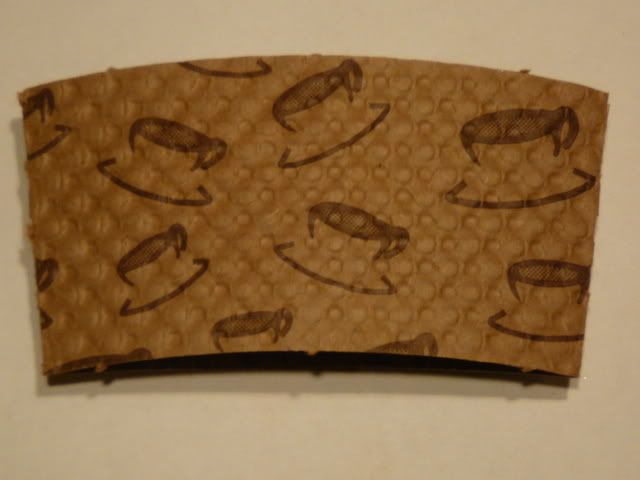
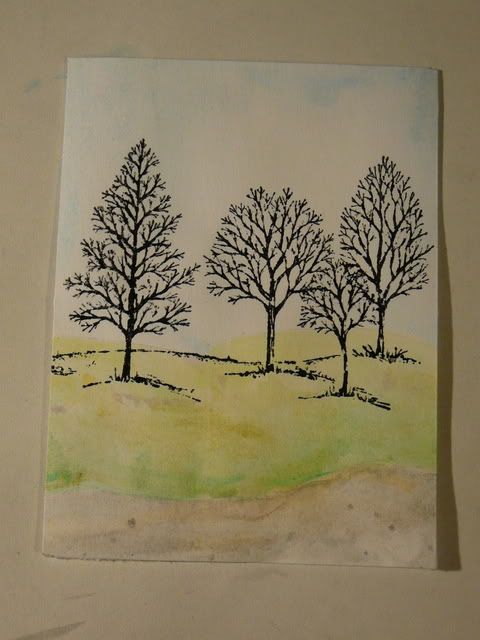
For a background I stamped some trees on a piece of Whisper White card stock and watercolored it to create a simple landscape.

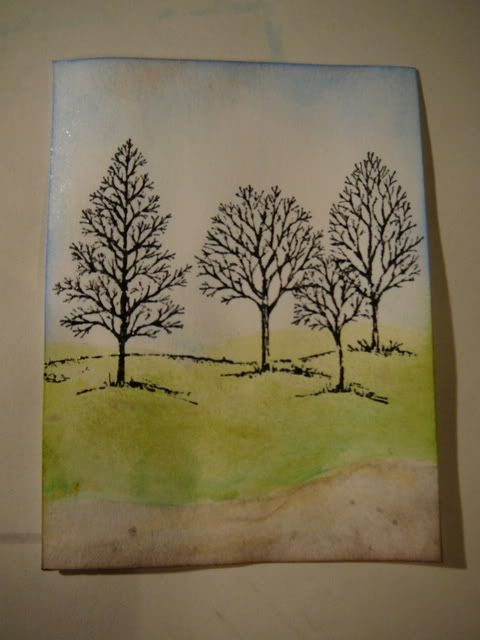
I added a bit more water coloring and then sponged the edges with green, blue and brown inks.


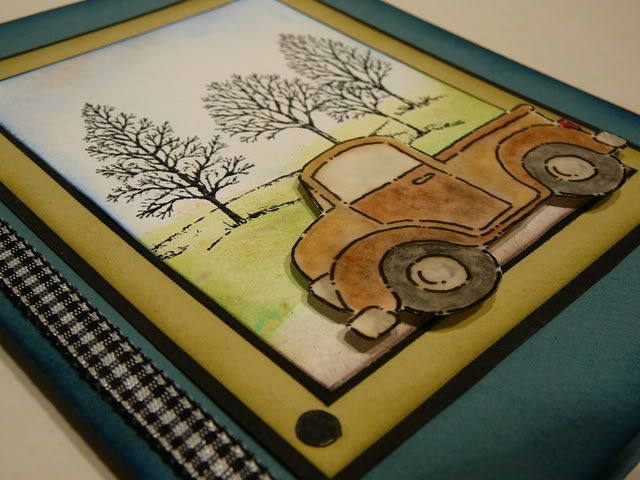
Then it was a simple matter of assembling my card.

Stamps used - Loads of Love, Lovely as a Tree (Stampin' Up)
Inks - Certainly Celery, Chocolate Chip, Ballet Blue (Stampin' Up)
Card Stock - Whisper White, River Rock, Basic Black, Blue Bayou
Accessories - Prisma water color pencils, brads, embossing powder, aqua pen, heat gun, gingham ribbon, adhesive.

I hope your day is fantastic!

Sunday, June 29, 2008

True Happiness

True Friend - Stampin' Up I made this card for yesterday's inspiration challenge at SCS. The large flower is from True Friend, the small one is from Baroque Motifs and the words are from Warm Words, all Stampin' Up.


I got the idea for doing the tags that way from this card by Michelle Woerner. I colored the flower with water color pencils and heat embossed it with clear embossing powder.

For the two panels, I stamped the flowers on white card stock, using Versa Mark and then heat embossed them with clear embossing powder. Then I sponged them with More Mustard and Real Red inks.

The card base is Close to Cocoa that I sponged with Chocolate Chip ink around the edges.

Have a happy Sunday!

Saturday, June 28, 2008

Confessions of a Whimpy Stamper

Here is a card I made using the rocket from Pun Fun. I am not very inspired by that particular stamp, but this card by my sister had me giving it another look. I should have left it on the shelf. Oh well, not every card can be a masterpiece, right?

For a card I stopped caring about partway through, I sure stressed over stamping "You're a blast." Anyway, that is my confession. I am a scared stamper. I have a hard time stamping small images without rolling the stamp and making it blurry, or not getting it fully stamped. So I test and test, ad infinitum.

This picture shows the portion of my practice paper where I kept testing. There were more than that, but I think there are around 15 or 16 in that one area. You would think with that much practice, it would be perfect. Oh, to be a fearless stamper.


Have a fun day!

Friday, June 27, 2008

Little Birdie

Touch of Nature- Stampin' Up CardCan you tell I love this new stamp set? It is retiring soon, but I am not a demo, so I don't mind. If the smoke clears enough to get a little sunshine, I will try to take another picture. This one doesn't do it justice.

Allison's challenge this week is to use anything you would find in the air and the Ways to Use it Challenge on SCS is "birds" so I decided to meet both challenges in one.

The stamp set is called Touch of Nature (Stampin' Up). The papers are Whisper White (for stamped images), River Rock, Basic Black, Very Vanilla, an Close to Cocoa. I sponged the edges of all the layers.

The images were stamped with Black Stazon and then water colored with Prisma water color pencils. They were then cut out and heat embossed with clear embossing powder.

Happy Friday!

Thursday, June 26, 2008

Tissue Background Tutorial

Hi there. I made this card is for the color challenge at Kristine Werner's blog this week. There are instructions below for creating the tissue paper background. The bird is from Pun Fun and the swirl stamp is from Baroque Motifs, both from Stampin' Up.


Start by laying ink on a piece of Plexiglas. You can use reinkers or if you are like me and don't have many colors, just sponge or apply the color from your stamp pad.

If you do it this way, be sure to start with your lightest color first and work darker from there, so that you don't muck up you light colors.


Keep adding colors until you are satisfied. I used River Rock, Groovy Guava and Purely Pomegranate.


Next, spritz the plexi with water. You want to add enough to help the colors blend together, but not get muddy.

Lay a piece of tissue paper over your plexi. You can scrunch it up and smooth it out first, if you want some creases. Pat down the tissue until it is saturated. Lift it very carefully (it tears easily when wet). Allow it to dry. You can speed the process up with a heat gun if you are careful.

Use a paint medium like Modge Podge and paint the surface of a piece of card stock. I used clear gloss medium by Liquitex, but you could even use watered down glue if you would like.

Lay the piece of tissue on the card stock and gently add another coat of the medium. Allow to dry.

Once dry, trim to the desired size. It is a good idea to use a guillotine style cutter. Sometimes when I used a sliding trimmer the tissue tries to tear, rather than cut.

For a more finished look, cover the surface with Versa Mark and heat emboss with clear embossing powder. You can also add a stamped image first, like I did.


Is that clear as mud? Let me know if you have any questions.

Have a great day!

Wednesday, June 25, 2008

Unlisted Birthday


Hello, this is a quick card I did yesterday. The stamps are from Inkadinkado. I love this cute lizzard.

The papers are Whisper White, Blue Bayou, Basic Black and River rock. I used my corner rounder to make the scallops on the outer circle.

So, why is it that men cannot see dirt or a mess inside that house, but one little thing out of place outdoors and they can't miss it? Is it a genetic anomaly or merely a clever ruse to avoid housework?

A few days ago, I moved one measly little wheel barrow full of dirt from one location to another in our yard, and we are talking about a big yard. When he came home, it only took my husband one look outside to question what I had been doing, yet several pairs of his shoes in the family room or a pile of dirty clothes in our room remain invisible.

Hmm...Sounds suspicious to me. I think these men are smarter than they look.

Tuesday, June 24, 2008

Perk Up!

coffee card
This card is for the Gina K challenge over at Split Coast Stampers. I just ordered my first Gina K stamps. They aren't here yet, so I drew this coffee mug to participate in the challenge.


I keep seeing all these fun projects using the little cardboard thing-a-ma-jigs from when you buy coffee. Anyone know what these are called? Anyway, I have been wanting to use one on a card.

The sketch challenge had a vertical panel on the left and the coffee cups on the cardboard would have been sideways if I just cut a long section from it, so I cut two squares and stacked them.

I drew the image with pencil, then went over it with a black craft marker. I colored it with water color pencils and used Versa Mark to heat emboss it with clear embossing powder. The coffee thingy is sponged with Chocolate Chip ink and mounted on a black layer. Below that is a layer of Creamy Caramel, sponged with So Saffron ink.

This is a picture looking out my front door yesterday. The reason it looks blurry and dark is because of all the smoke from the wild fires burning here in northern California. I can barely breath when I go outside. How do the firefighters do it? Keeping my fingers crossed that they all stay safe and no other families lose their homes.

Monday, June 23, 2008

Touch of Kindness

TOUCH OF NATURE CARDGood morning! I hope everyone had a great weekend. Mine was spent working in the yard and now I am sore. The perils of growing older, I suppose.

This card is one I made for my Stampin' Up demo in return for a gift she gave me. Once again I pulled out Touch of Nature (Stampin' Up). I stamped the fern with black Stazon, on Almost Amethyst card stock, and heat embossed it with clear.

Touch of Nature Stampin' Up card
I stamped the flower with black Stazon, on Whisper White card stock, and heat embossed that, as well. I colored the flower with water color pencils and heat embossed it with clear, by first covering it in Versa Mark.

The layers are Almost Amethyst, So Saffron, both sponged with Lavender Lace and So Saffron inks, and basic black card stock. The flower was cut out and raised with pop dots.

Have a great day!

Sunday, June 22, 2008

I Am One Lucky Stamper

I was so thrilled to receive this wonderful package of goodies from Loretta. She really put a lot of time into selecting and creating all these yummies. I got clear stamps, brads, handmade note cards, a gift bag, a little canvas bag to embellish and even some moolah to buy more goodies.

I wanted to show you these pretty butterflies that Loretta included in the package. She makes these herself. They have little pins on the back so you can wear them on a blouse or scarf, but I can think of all kinds of uses for them. She has a tutorial, so if you want to make some, go check it out.

Thanks, Loretta, for the wonderful blog candy. You are so generous.

BTW, Loretta has another blog candy contest going on. All you have to do is leave her a comment.

Speaking of blog candy, I found out from Sarah, that I won a complete combo set of Nestabilities that she was offering on her blog. Wow, was I blown away. So now in addition to all the goodies above, I am also have Nestabilities coming. Am I one lucky stamper, or what?

Anna, I took your advice and bought a lottery ticket. It wasn't a winner, but I don't mind. I still feel very lucky. =)

Friday, June 20, 2008

Touch of Nature Anniversary

I made this card for my husband for our anniversary today. We have been married 21 years, which is remarkable since that is also my age. Allison's suggestive Sunday challenge this week is flowers, so this card works for that.

The stamp set I used is called Touch of Nature from Stampin' Up. I colored all the images with water color pencils and heat embossed them with clear embossing powder.

The flower and three branches were cut out. The flower is raised using pop dots. I sponged all the layers using Certainly Celery and/or Chocolate Chip ink. The papers I used are Wild Wasabi, Close to Cocoa, Basic Black and Whisper White. I added three imitation dew drops from Michaels.

I want to say thanks to everyone that leaves comments for me. I so appreciate them. Have a great weekend!

Thursday, June 19, 2008

Firefox Tip

Recently I switched from Internet Explorer to Firefox. One thing I really missed from IE was the ability to set more than one home page, so that when my browser opens, several tabs to sites I visit every day open.

I now know how to do that in Firefox. It is actually very easy.

Just open tabs to any sites you want to open every day. (I have tabs for Gmail, MSN, Google Reader and Cash Crafters (my other site). I probably should add SCS and a few other.

Click on Tools

Click on Options

Click on Main

Click on "Use Current Pages"

Click on Ok

I bet just about everyone out there already figured this one out. But in case there are any of you out there, floundering about like me, I hope this helps.

Just a quick note...

Debbie has some great blog candy up for grabs. Head on over for a chance to win...

Wednesday, June 18, 2008

Nature's Welcome

I got a new Stampin' Up set called Touch of Nature and created this card with it today. I think I am going to like this set.


Sarah is having an inspiration challenge (with some amazing candy - check it out) on her blog and I made this card for that challenge. This is the inspiration piece.

It was a real struggle at first, trying to use this piece, but eventually it came together.


The bird on a branch from Touch of Nature was stamped on Close to Cocoa and on Blush Blossom, using Chocolate Chip ink. I cut the branch from the Close to Cocoa and the bird from the Blush Blossom. The bird is raised using pop dots.

The next layer is the fern stamp on Pretty in Pink. I sponged around the edges with Chocolate Chip ink and added dots with a craft marker. That was mounted on a layer of Chocolate Chip and then on Pixie Pink.

The medallion is made using two stamps from Spring Solitude (SU), stamped in Versa Mark and heat embossed, with clear embossing powder, on Whisper White card stock. I then sponged around that image with Chocolate Chip ink and cut it out with a circle punch.

I hope you have a great day!

Tuesday, June 17, 2008

Truly Kind Friend

Hi there. I made this card using a stamp from True Friend by Stampin' Up. The sentiment is from Baroque Motifs (also SU). I stamped the image with Stazon and embossed it. Then I colored it with water color pencils and then embossed the whole thing with clear embossing powder.

The top oval is Whisper White that was sponged with So Saffron, Pumpkin Pie and Real Red. Then I ran it through the Cuttlebug using the Swiss Dots folder. There is a black layer behind the top oval and a Certainly Celery layer, sponged with Certainly Celery ink, behind that. The blue layer is Blue Bayou, sponged with Bashful Blue and the card base is Wild Wasabi.

Thanks for stopping by!

Monday, June 16, 2008

Guitar Card

My daughter turns sixteen today! It is so hard to believe that sixteen years have passed so quickly. She loves to play the guitar and has an acoustic and electric that she plays. I made this card for her. Hopefully she will like it.

The card is a case from this one I found on Split Coast Stampers. As soon as I saw it, I knew I would have to case it for my daughter. I made some changes so it would more closely resemble my daughter's guitar.

The card base is Basic Black and the guitar is More Mustard. I just freehand drew the basic shape and then cut it out by hand. To get some texture on the paper, I did some sponging and water coloring, with some heavy sponging around the edge with Chocolate Chip ink.

I was out of black brads, so I used black Stazon to make some. The strings are just doubled over black thread.

I hope you have a great day!

Sunday, June 15, 2008

Coasters For Dad

Remember this card I made for my dad for Fathers Day? I used it for inspiration to make some coasters for him, using photo coasters I purchased at Bed Bath and Beyond. I started by making four small drawings.

Each coaster holds a 2 1/2 inch square photo. Before I colored the images, I had to reduce them on my copier. I find it difficult to draw very small images, so mine were too big to fit in the coasters. Stamped images would have been a lot easier, if I had some that would be appropriate for my dad.

Next, I cut the images down and backed them with Close to Cocoa cardstock. Below are each of the completed coasters.


For this one, I used the same photo as I did when drawing the fly for my card.

This was the first one that I colored and it didn't come out very well. I had never used water colors on a photocopy before and didn't realize how much the ink would run. So it is a little smeary.


This is the box that the coasters came in. They were only $9.99 at Bed Bath and Beyond and I understand they can be found in several department stores, like Mervyns or Gottschalks.

A Good Egg, Stampin' UpI have to give my mom credit for this idea. She had some of these coasters and used her A Good Egg set (Stampin' Up) to decorate them for Easter. She plans to change them out with each season. Isn't that a good idea?

I think this would make a great house warming gift. You could create inserts for all the major holidays and some seasonal inserts for in between holidays and give it as a completed set. Might be a fun make and take idea for demos, too.