 This is a fun and easy project. I got the idea for this from a handmade card my grandma bought.
 Start with a standard card envelope (A2 I think) and be sure to seal the flap down before starting. Cut off one side at 1 1/4 inches. This will be the top of your card and the larger portion will be the bottom.
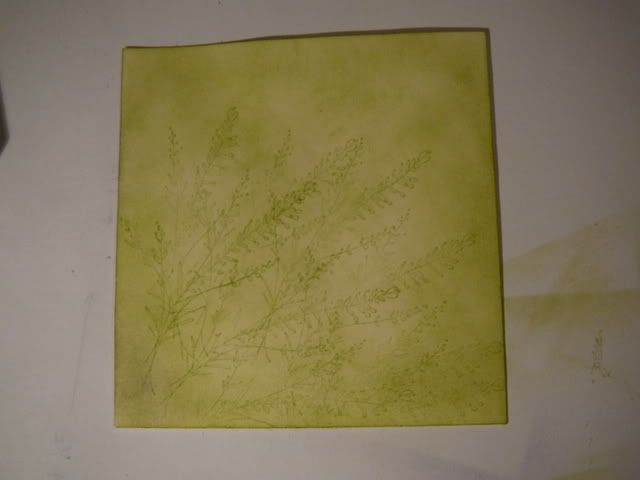 Before proceeding, I did some sponging and stamped a few images of foliage for the background.
 Now run the bottom piece through your crimper. You want the cut part to be to the side as it goes through the crimper, so that the crimp lines are perpendicular to the cut side.
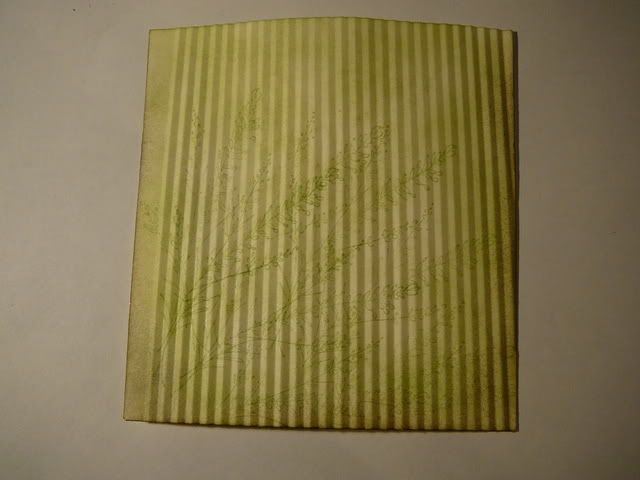 Here is what it looks like after going through the crimper. (Don't worry, I went back and fixed that part of the left that didn't get crimped. ) The cut side is at the top and has an opening that the card insert can slide into.
Now that the bottom part is crimped, the small piece that you cut off earlier will slide over the bottom part.
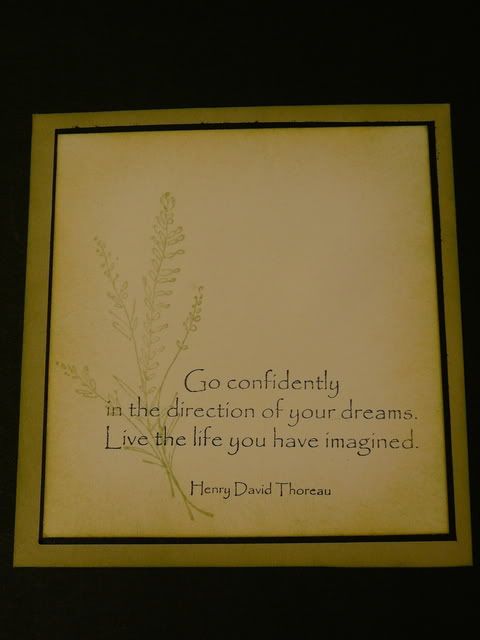
Here is the insert I made. The measurements for the bottom layer are 4 inches wide by 4 1/4 inches high. The image and quote are both from Botanical Dreams, a Gina K Designs stamp set.
 Here it is after I decorated the bottom and top, with the insert slid partway in.
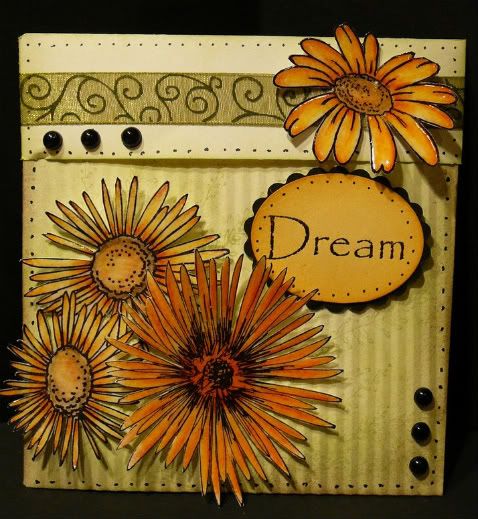
 And here it is, all closed up. All images are from Botanical Dreams and Flowers For Daisy from Gina K Designs.
The flowers were stamped with Stazon and heat set. Then I colored them with Koh-i-noor pencils, blended with odorless mineral spirits. After cutting the images out, I heat embossed them with clear embossing powder.
Have a terrific day!
15 comments:
terrific pocket card!
Wow! It took me a while to figure out what all the pieces were, but once I read your tutorial, I came to a decision that you are a crafting genius.
Beautiful decoration inside and out.
WOW! Awesome card Theresa, love it.
WOWZER!! What a very stunning project!! Love the way those flowers just jump right out at you!! so beautiful!! :) TFS!
Theresa, I love how you did your flowers for this card........and the card is sensational too of course!
Hi, Theresa. I've nominated you for a Brillante Weblog award. See my blog for details. :o)
This card pocket is just beautiful.
Beautiful, beautiful!! Love the idea and the tutorial. Your coloring & embossing make your cards works of art!!
I loved this! Great idea... and the colors are perfect, too. Thanks for showing us how.
Swedie
What a beautiful and stunning card!! Your creations are very pretty Theresa and TFS the tutorial!
BRILLIANT!!! I can't wait to try this technique ... thanks sooooo much for sharing!
You rock, my friend!!!
~Hugs, Deb
I love how you did this..what a brilliant idea.
this is so wonderful! i am so glad i stumbled onto your blog. i am going to spend a while checking out all your creations. tfs.
Beautiful!
I love those stamps!!
Beautiful! I've made the same pocket cards before but it was refreshing to see one in the colours you chose! It's perfect!
Post a Comment