On the inside of the card, I stamped a verse, from Birthday Greetings, and then stamped one of the fish, from Under The Sea, using Memento Bahama Blue ink.
To begin my card, I stamped the two smaller versions of the clownfish and butterflyfish, using Memento Tuxedo Black ink. To color the first fish, I began by filling in with Y17.
Added YR07.
Added R08.
Then, for the stripes, I used N5.
And added N7.
For the clownfish, I began with C5 on the stripes.
And added 100(black) to shade even more.
For the opposite stripes, I filled in with B00.
Then shaded with C3.
After coloring, I cut out both images with my Cutterbee scissors.
For the background, I used Spellbinders™ Nestabilities® Classic Circles to cut a piece of Pure Luxury White card stock, then sponged with Memento Bahama Blue ink.
Then stamped the seaweed with Memento Bamboo Leaves.
Instead of sponging the sea floor this time I used Copics to color it. I colored in an area with E31, then added some shading with E33.
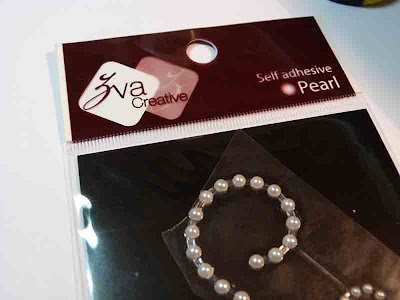
I thought the Zva pearl swirls would make the perfect embellishment to mimic air bubbles for the fish, so I took a package and cut it into sections on the transparent sheet. Then when I was assembling my card, I could move the pearls around to see where I wanted them, before peeling them off the transparent sheet.
Here you can see the finished card. I stamped the birthday greeting on another circle and sponged with Memento Bahama Blue also. I adhered that to a piece of Pure Luxury Turquoise Sea, which I had scored with my Score-Budddy. The large circle was adhered with Pop Dots, then I added the pearls. I also cut some individual pearls to place immediately above each of the fish. I layered with a piece of Pure Luxury White and used Ocean Mist for the card base. Finished size 5 ½ by 4 ¼ inches.
If you love Zva pearls and gems as much as I do, you can find a list of retailers that sale their products by clicking here.
Thank you so much for taking some time to spend with me. I hope you have a wonderful day and weekend!


4 comments:
Thanks for the great tutorial. Your card and your new set is awesome!
Super, sharp and special. This card is so charming and that stamp set is on my wish list. I just made a fish card with die cuts but it would be some much better using that stamp set.
http://carolescreativecritters.blogspot.com/2012/06/play-date-cafe-pdcc135.html
Another gorgeous card Theresa! Thank you so much for the tutorial!
Beautiful card! I just love your style and look forward to checking your blog everyday! Thanks so much for sharing the tutorial for each card - I've learned a lot by watching these!
Post a Comment