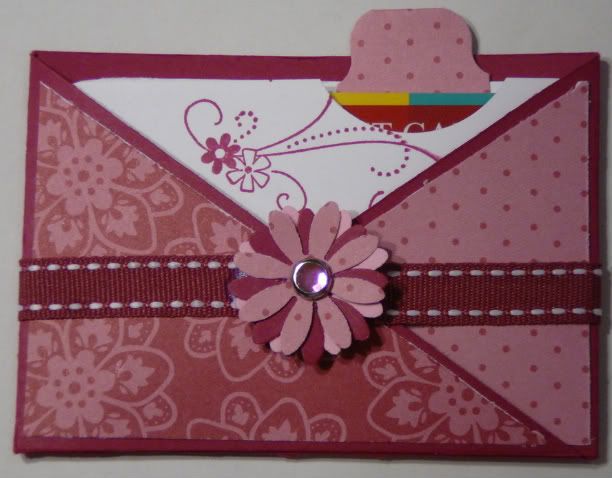
I love the criss cross card technique and thought it would make a cute gift card holder if sized down, so I modified the design a bit. It uses a piece of 3 by 11 inch card stock and I wind up with a lot of scraps that size, so this is a good way to get rid of those.
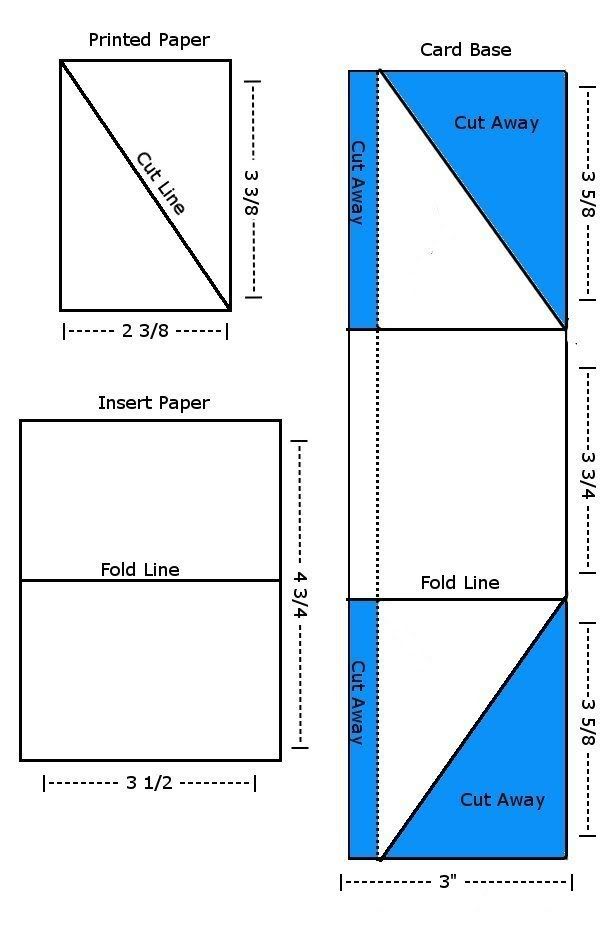
To start you'll need a piece of 3 by11 inch card stock for the base, 2-3/8 by 3-3/8 piece of double sided pattern paper for the front (I used a scrap of Bali Breeze paper), and for the insert a piece of 3-1/2 by 4-3/4 card stock. You can click on the image above to view it larger.
 Take a piece of 2 -3/8 by 3 -3/8 double sided printed card stock. Cut that piece on the diagonal.
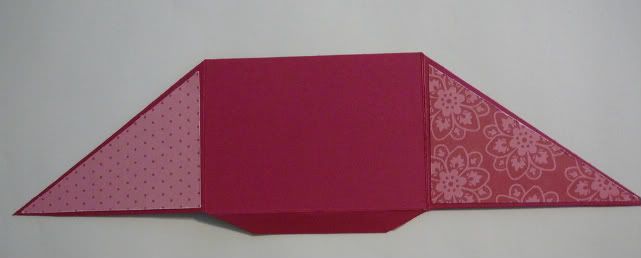
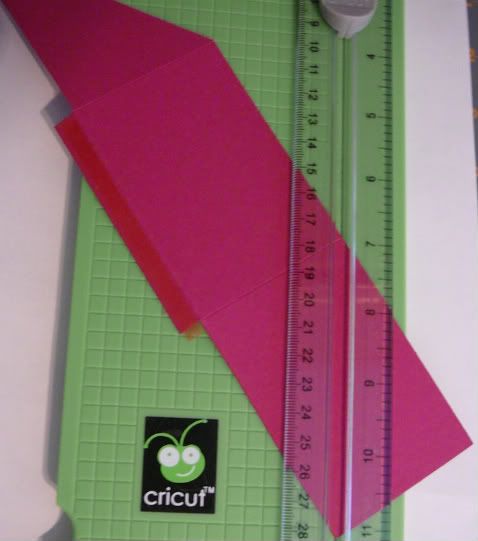 For the card base, take the piece of 3 by 11 inch card stock and make a vertical score line at 3/8 an inch, then make horizontal score lines 3 5/8 inches in from either side. Trim the narrow rectangular sections as shown in the graphic above. Then make the diagonal cuts as shown.
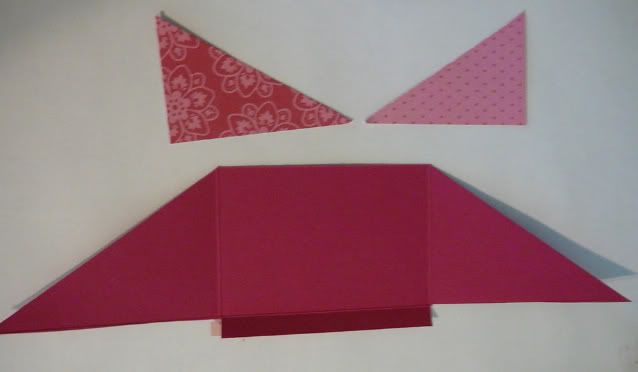
Now you should have the card base, with scores and cuts as shown, and two triangles of patterned paper.
 Adhere the triangles to the side flaps and trim the corners of the bottom flap.
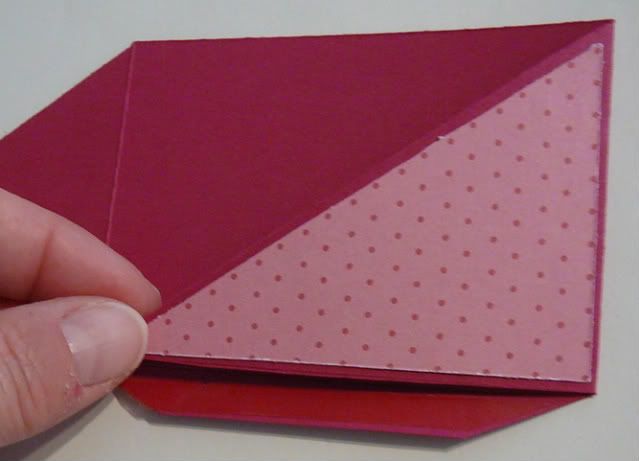
Fold over one of the side flaps. Remember how we cut the corners from the bottom flap? This is because the bottom flap will be sandwiched between the two side flaps and would show if left untrimmed. You really only need to cut one side, but I find it easier just to do both rather that worry about which one needs to be trimmed.

Before adding adhesive to the bottom, go ahead and fold the bottom flap up and then the other side and check to be sure you have trimmed the bottom flap well enough not to show. If everything looks ok, add sturdy adhesive to the bottom flap and fold up.
Note: The bottom flap is sandwiched between the side flaps so that the insert will slide in without hanging up on it. This was a problem with the first one I made so I adjusted the design.
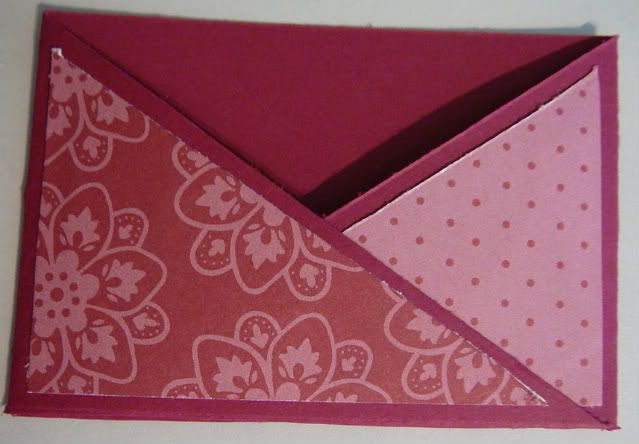 Add adhesive to the other side flap and glue that side down as well.
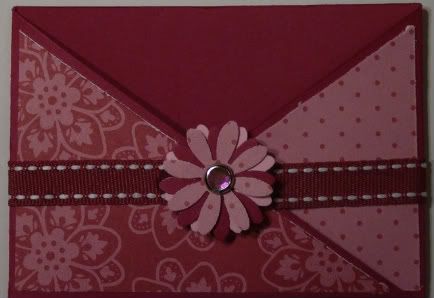 Embellish as desired. For this one I used punched flowers and a brad with a band of Purely Pomegranate ribbon.
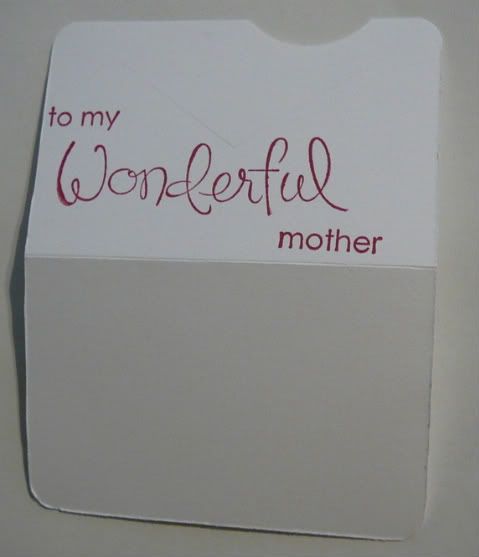
For the insert, cut a piece of card stock to 3 -1/2 by 4 - 3/4 inches. Score it half way on the long side at 2 - 3/8, so that when folded the insert is 3 -1/2 by 2 - 3/8 inches. You can use a circle punch to cut out a semi-circle if you want to add a round tab.
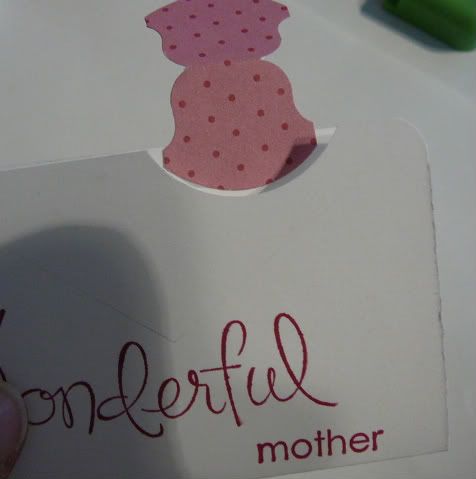
You can see here how I added the round tab to the back to line up with the semi-circle. I also rounded the corners of the insert.
I hope these directions are thorough enough. If anything is unclear, just let me know.
Have fun!
4 comments:
I love this technique too - I've actually started one with the exact same papers as you but I hadn't finished it yet - you've given me some much needed inspiration. Thanks
This is adorable! All the good looks of a criss-cross card without the ridiculous amount of cardstock. Love it!
Thanks so much for your detailed instruction and photos.
I love your gift card holder. Posted it in my "Reader" section. Hope that's okay!
Post a Comment